The Editor Component
Custom Transformation Plugins - The Editor Component
IMPORTANT: Developing custom plugins as described in this section involves the use of Microsoft's Visual Studio integrated development environment (IDE) for Windows. It is not recommended for anyone who is unfamiliar with Visual Studio, C# Development, or object orientated programming.
Let's now take a look at the EditTransformation.cs designer template.
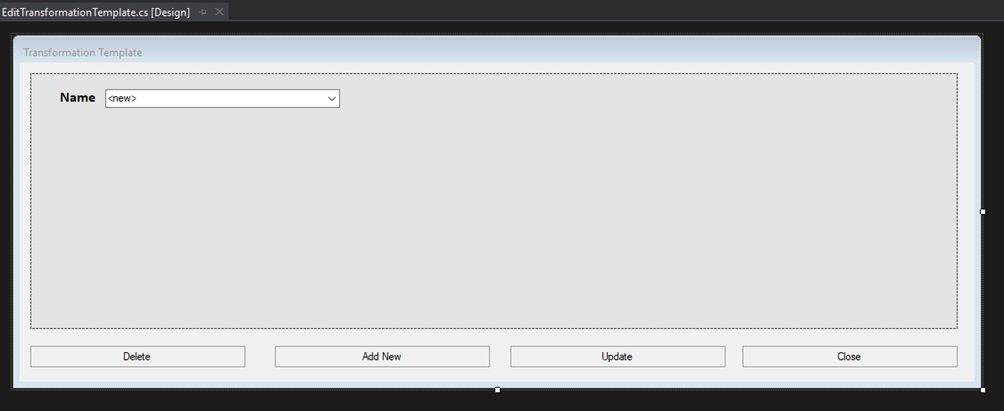
We have a Name combo box at the top-left corner and four buttons at the bottom: [Delete], [Add New], [Update], and [Close]. These 5 controls should behave in a way that's consistent across all transformations for it to work seamlessly in TagsCollector.
Transformations are saved as DataTables in .xml files. They are loaded into a local DataTable variable in both the Editor and the service.
The Name combo box is the control that shows the user all of the saved transformations. When the selected index is changed, the newly selected transformation is loaded into the controls (not yet present on this example) for editing.
[Delete] removes the transformation from the list and saves the updated data table to the .xml file.
[Add New] checks if a transformation with the same name already exists, and if not, adds the transformation to the Data Table and saves it to the .xml file. If a duplicate exists, a message box shows the user there is a duplicate and nothing is saved.
[Update] checks to see if a transformation with the same name already exists. If one does exist, the transformation that exist is updated. If one does not exist, a new transformation is created, added to the Data Table, and saved to the .xml file.
[Close] clears the form and hides the window. It is very important that the window is not disposed of because only one instance of the object is created for the lifetime of the parent object. If the window is disposed of, it will throw a null reference exception the next time it is opened. The form is disposed of whenever a user clicks the [x] button on the Window's task-bar icon. To overcome this, the OnFormClosing event has been modified in the template to hide the form instead of disposing it.
The rest of the transformation is entirely customizable. There are numerous possibilities. Let's explore the creation of a simple transformation that takes a user specified value and compares it with the tag’s input value. If the tag’s input value is greater than the user specified value, the output of the tag will be text specified by the user. If the tag’s input value is less than or equal to the user specified value, then the output text of the tag will be something else, also specified by the user.
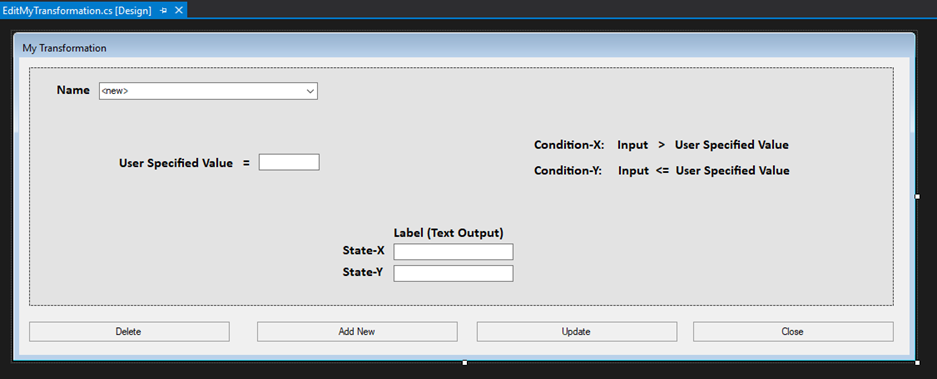
Here, we added some controls that allow for user input. The text boxes next to State-X and State-Y will be the user-specified text that shows when Condition-X or Condition-Y is met, respectively. The text box next to User Specified Value will be compared with the tag’s input to determine the State.
When [Add New] or [Update] is clicked, we need to save the values of each of these controls into the Data Table for the transformation.
The events for [Add New] and [Update] should not be modified themselves. Instead, the methods within them UpdateDataTable(row) and SetEmptyValuesToDefault() should be modified and tailored to each transformation plugin.
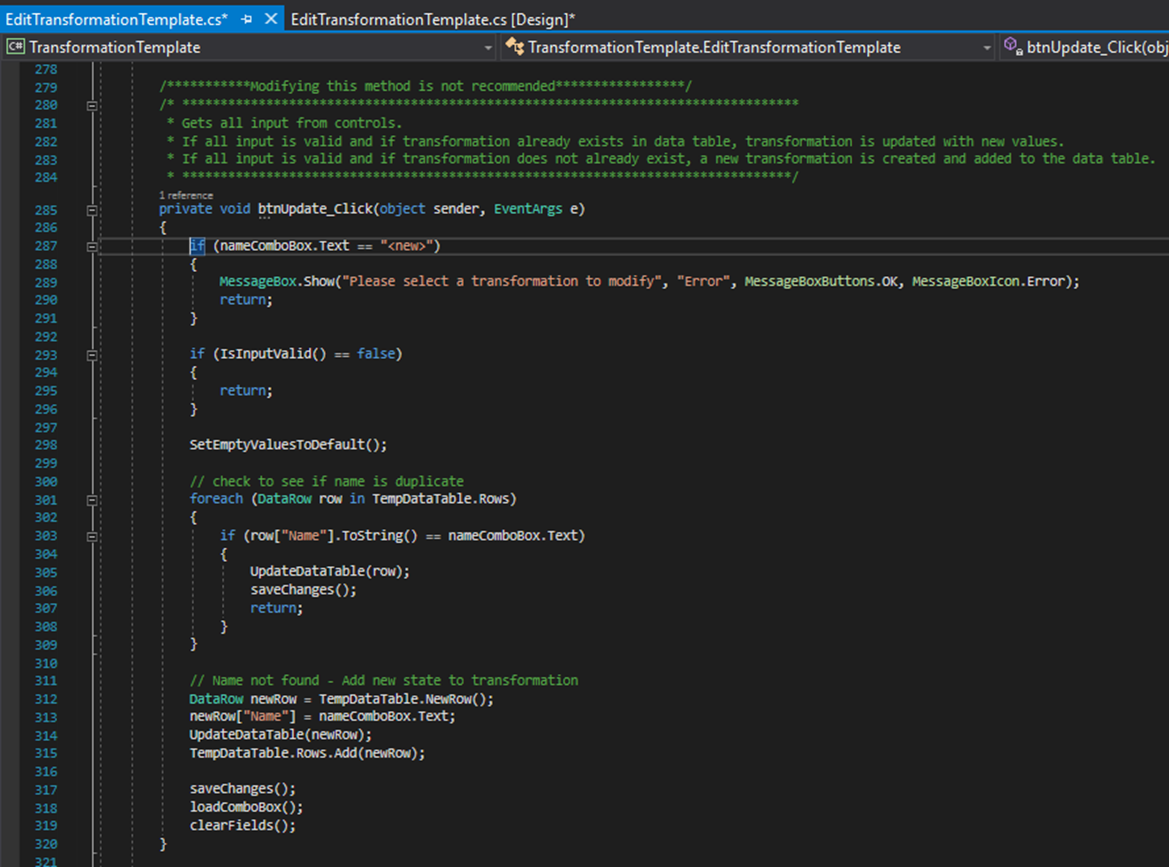
Any code labeled with “Modifying this method is not recommended” should not be changed

IsInputValid() is optional but highly recommended for validating user input. For MyTransformation, we want to make sure the User Specified Value is both filled in and is a valid number. We also want to make sure that the boxes for State-X and State-Y are filled in. The resulting IsInputValid() method looks like this:
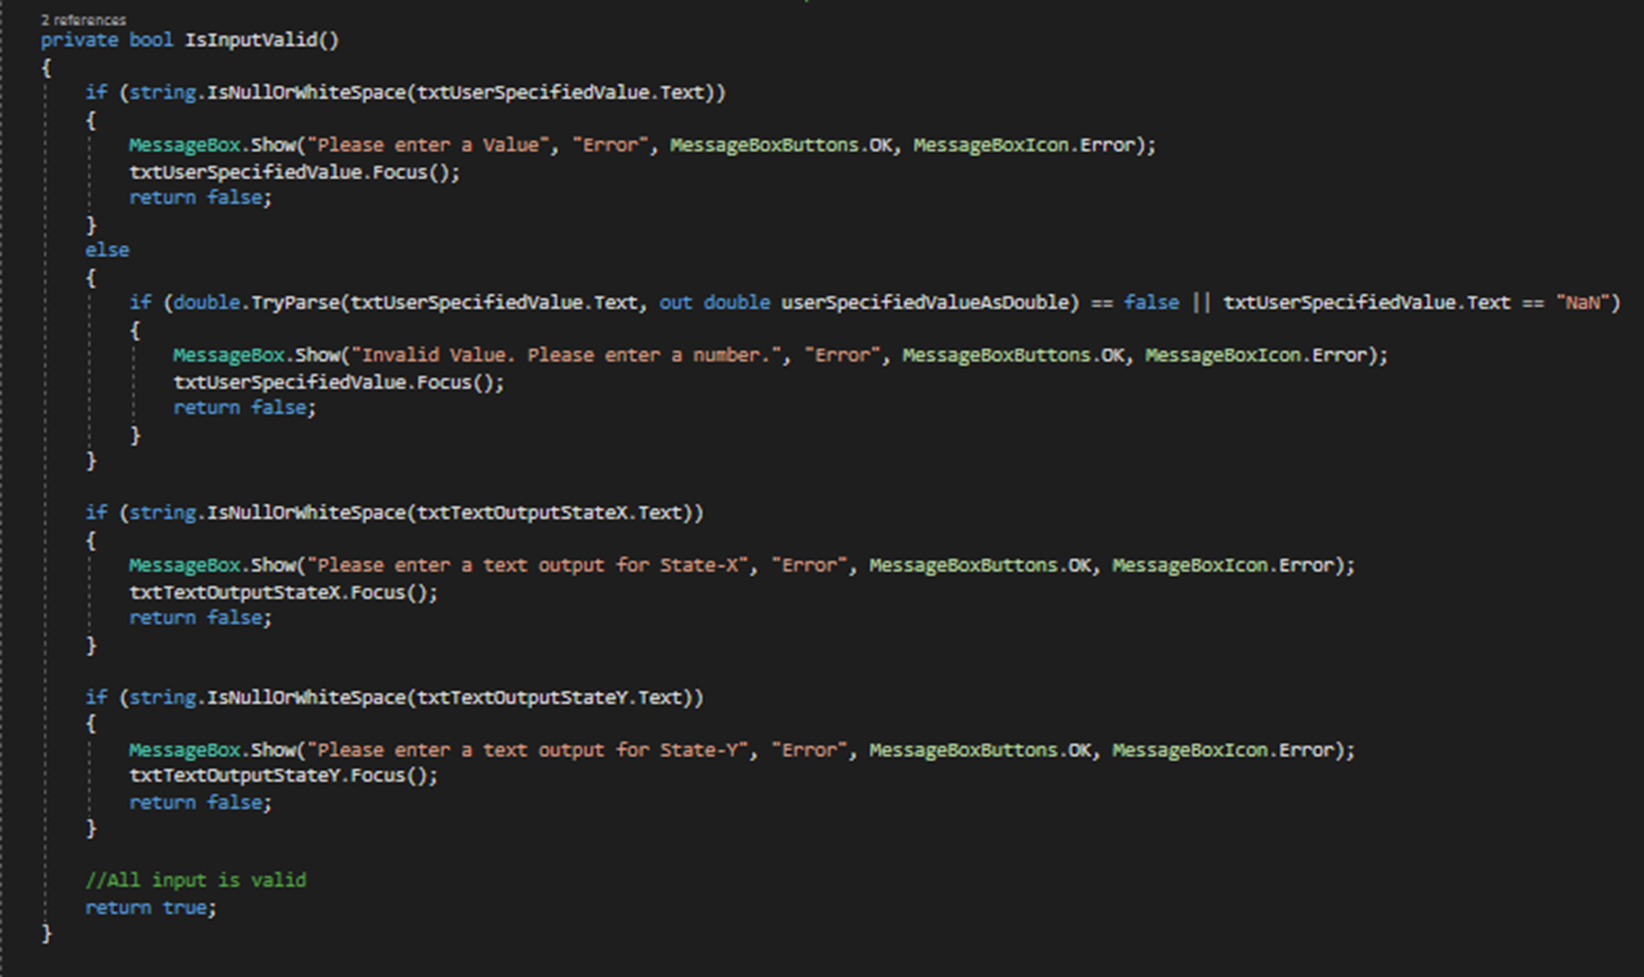
Do not forget to return “false” for any input that is invalid. If all checks run without returning “false”, the default will return “true” and all input will be considered valid.
SetEmptyValuesToDefault() is optional, but highly recommended for setting default values when input is allowed to be null or empty.
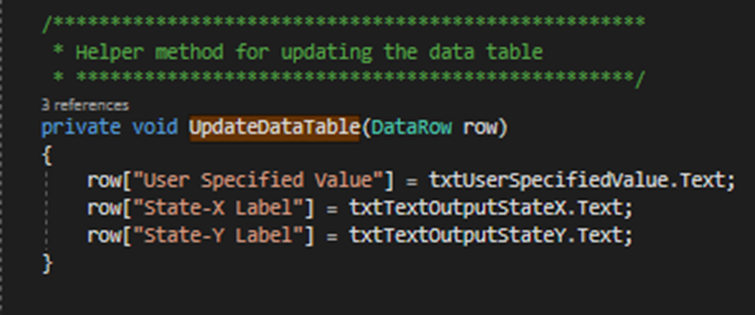
UpdateDataTable(row) is very important. This is where the values from the controls are saved into the new or existing row for of the transformation Data Table.
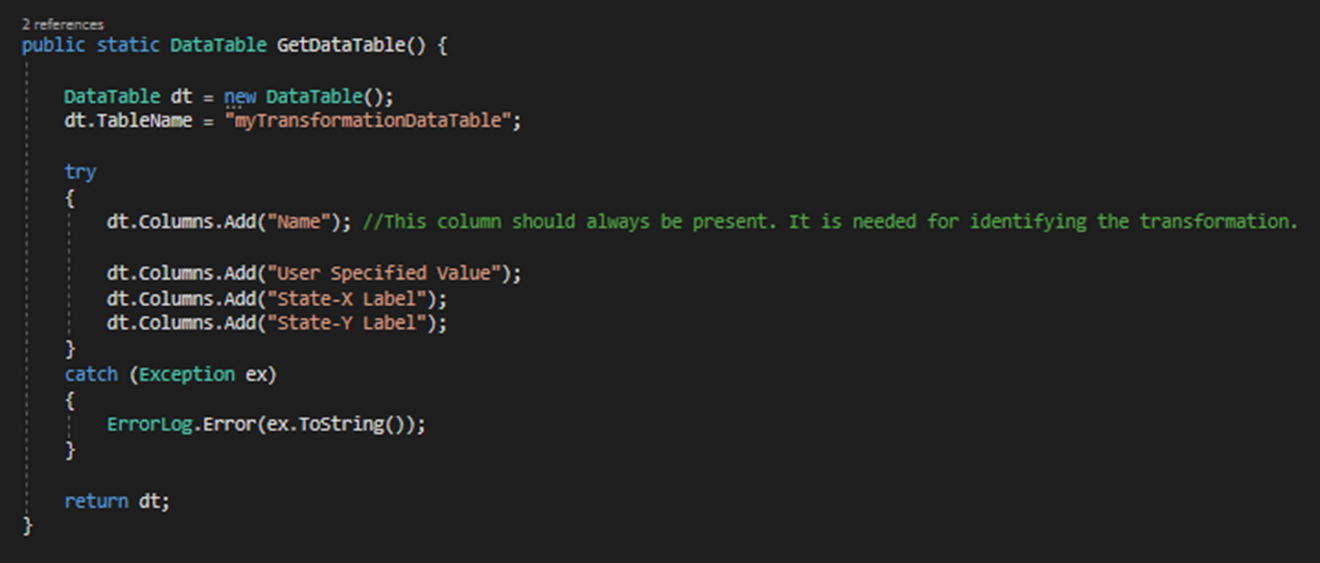
Before going any further, we should specify our Data Table structure in Global. There is a static function called “DataTable GetDataTable()” that should create and return the transformation data table.
Every transformation Data Table should have a “Name” column. In our example, we will need a column for “User Specified Value”, “State-X Label”, and “State-Y Label”. Based on these specifications, the resulting GetDataTable() method in Global should look like this:
Now that that’s complete, we can return to our UpdateDataTable(row) method in EditMyTransformation.cs.
Now that this part is finished, we are going to update the LoadControls(row) method. LoadControls(row) is called inside the nameComboBox_SelectedIndexChanged event and is used to load the data values from the saved table into the controls after a transformation has been selected from the dropdown.

That marks the completion of the UI portion of the Transformation. Next, we are going to move on to the code for the service, MyTransformation.cs.