OPC
For OPC Server Connection
- Open the TagsCollector Editor and select the Data Collection tab from the top of the page.
- In the data entry section at the bottom of the page, locate the Protocol drop down box in the Tag Type section and select OPC Server from the list of available options.
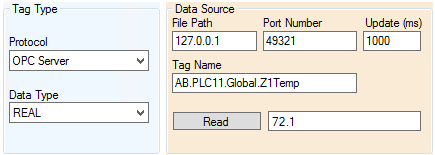
- Enter the File Path for the OPC server you would like to access (127.0.0.1 for local host)
- Enter the Port Number used by the OPC server where the tag resides (e.g. 49321).
- Next, you will need to either enter the fully qualified Tag Name assigned in the OPC server (e.g. AB.PLC11.Tank20.TankEnabled_19).
- Select the Data Type of the tag from the drop down list.
- Enter an Update time that is desired for the tag. See the Tag Update Time section for additional help in selecting optimum update times while reducing system overhead.
- Once the tag name has been entered, click the Read button to verify operation and see the current value of the tag.
OPC Client Configuration
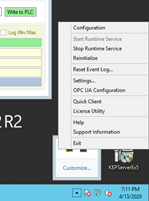
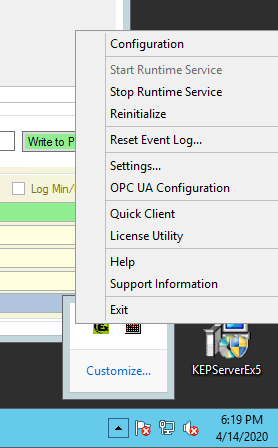
The first time TagsCollectorService starts with OPC tags, the OPC client may not connect because the certificate will not be trusted by the OPC Server. To configure trusted certificates, right-click on the KEP server tray menu icon and click “OPC UA Configuration”.
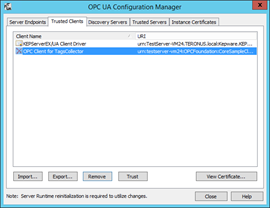
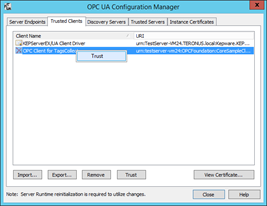
Click the [Trusted Clients] tab and look for “OPC Client for TagsCollector”. There should be a red “X” next to it. Click on the client to highlight it and then click the [Trust] button or right-click on the client and click [Trust] from the context menu.
- The data type must be one of the types from the “Data Type” dropdown menu in order for OPC writes to work.
- Actual name may be different depending on the configuration file. “OPC Client for TagsCollector” is the default.
- If the “OPC Client for TagsCollector” does not show up in the box and TagsCollectorService is running, try clicking on a different tab and then clicking back to refresh it.
Once the red “X” disappears, the server connection must be reinitialized. This can be done by right-clicking the KEP server icon and clicking “Reinitialize”.
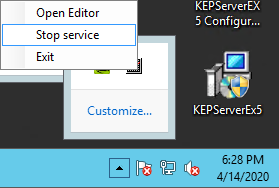
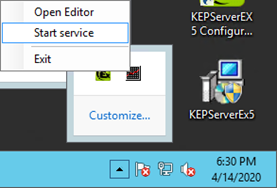
TagsCollectorService must also be stopped and restarted before the OPC tags can connect. This can be done in a number of ways, one of them being to right click the TagsCollector tray menu icon and clicking “Stop Service”. Then, after the balloon pops up and shows “Service Stopped”, right click the icon again and click “Start Service”.
At this point, the OPC tags should be connecting after the initial loading of tag data. If the OPC tags still aren’t connecting, please double check to make sure everything has been configured properly.
The folder for OPC client configuration file can be found in Root/OPC/Opc.Ua.SampleClient.Config, where Root is the name of the root folder of the TagsCollector database. A number of settings can be adjusted with this file, including the name of the application, where the certificate is stored, and the default session timeout. To reset the configuration file, delete the file and then restart TagsCollectorService.
Troubleshooting
It may take a few times of restarting TagsCollector and re-initializing the OPC connection before it works. Make sure to click off and back on the “Trusted Clients” tab to refresh after every attempt. After the client appears and is trusted, it may take several service restarts before the OPC tags are all working. It might be that just a few of them work on the first restart. Then more on the second restart, and the rest on the third or fourth. Once the OPC tags are initially connected, they should work on every startup.